Thursday, January 22, 2015

Quick Capture Challenge!

LETTERS, LETTERS, LETTERS!

Your next challenge:

We are alone but...
Sm...
She will...
1.  Choose a partner.
2.  See me for your "letters".
3.  Go out on campus and find (NOT CREATE!) objects that look like/read as the letters I have given you.
4.  IN PHOTOSHOP, download your images to spell the word you think I have given your team.
5.  Crop, alter the contrast, whatever you think will make your images interesting and readable, then save as JPEGS at 180 resolution and roughly 5 x 7".
6.  Create a NEW file in Photoshop to place your letters side by side.  the new document must be 180 resolution and should not be taller than 7".  The length will be determined by the number of letters your team has.
7.  Upload the final piece to the server AS A JPEG, labeled with your names and the title "Letters Capture".
8.  Due at the end of class today.

Monday, January 19, 2015

I used a Nikon D7100 with an 85mm Prime lens.
Shot outside, overcast, ISO 100

Thursday, January 15, 2015

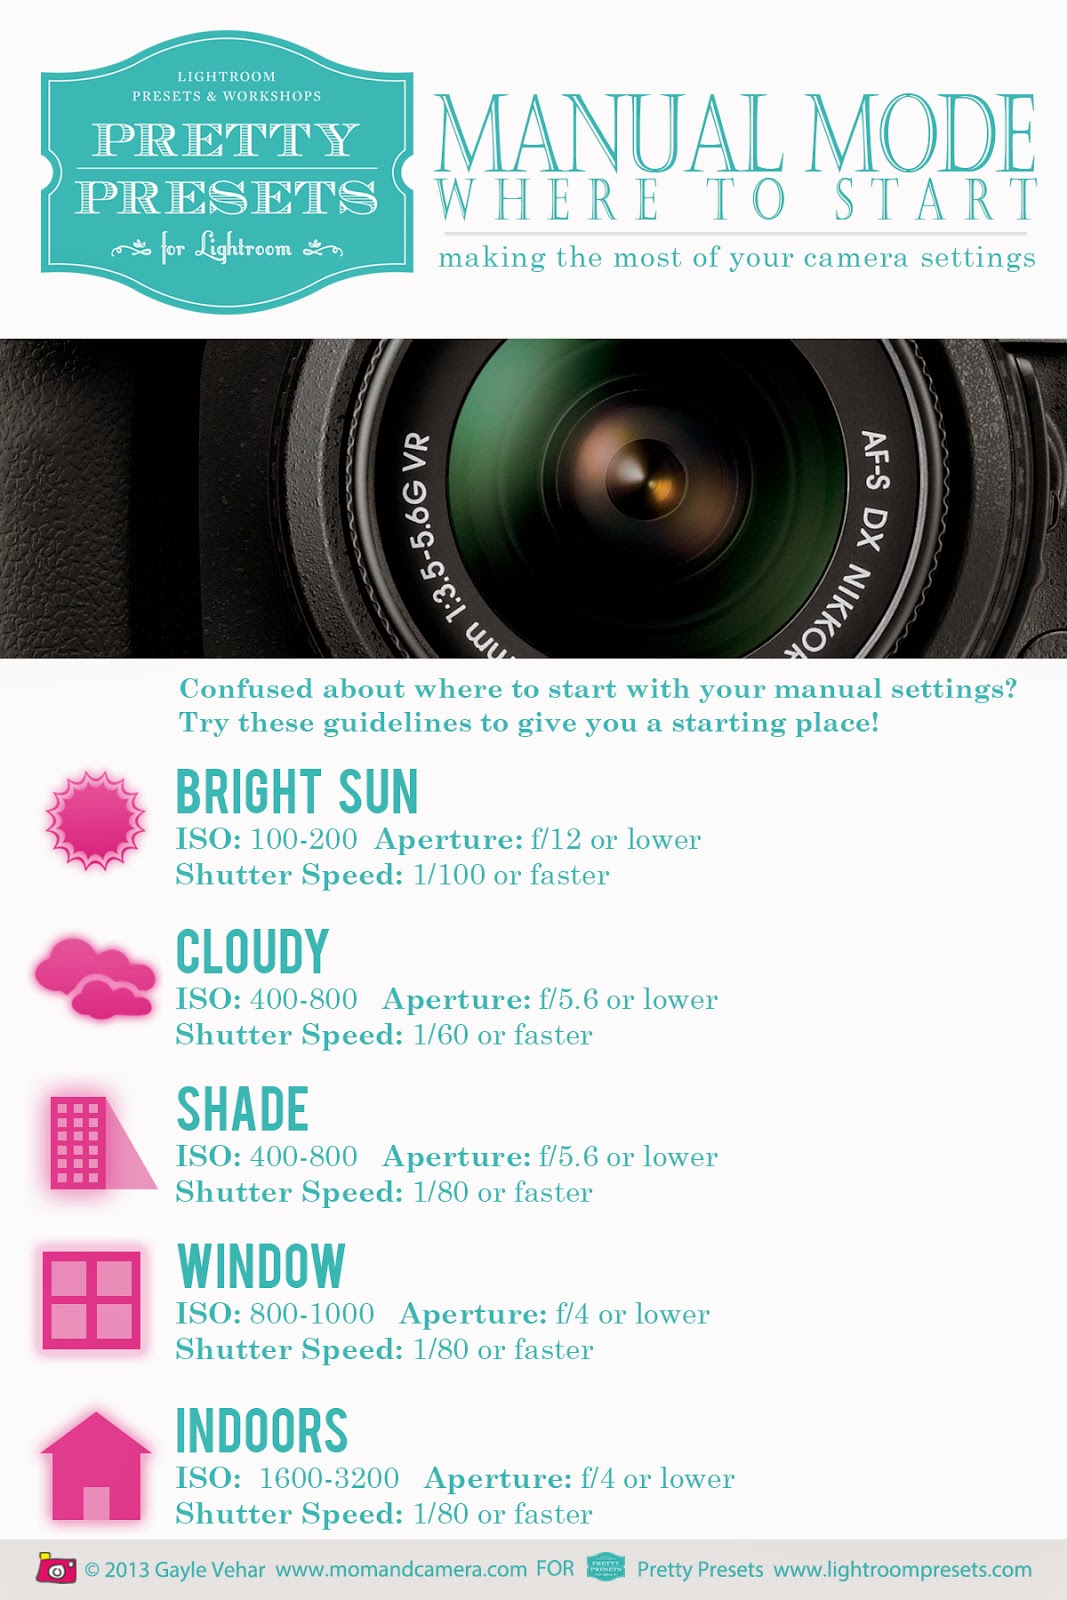
Understanding Aperture and Shutter Speed

Where to start...
by  

1. Aperture

Aperture is the amount of light that is allowed into the camera through an opening in the lens, and is measured in f-stops. The smaller the f-stop number, the more light that will be let into your camera. For example, at f/1.4, the opening in the lens will be wider than at f/22, therefore, the exposure will be brighter.
As you can see in this diagram of common f-stops, f/1.4 has a very wide opening, whereas f/11 is much smaller. Always remember: the smaller the numerical value, the larger the opening in the lens, and the brighter your photo will be.
You’re probably thinking, “Why would I want less light to enter my lens, why not just shoot at the widest aperture possible, at all times?” Well, when you have your lens wide open, less will be in focus in your photo. A photo shot at f/1.4 will have a shallow depth of field, with a lot of background blur. This can be great for portraits, but if you are shooting a landscape, for example, you will want to have more in focus in your photo, so you will want to avoid a shallow depth of field by having a smaller aperture of somewhere around f/16.
In the example above, look at the progression between f/1.8 and f/3.5. As you can see in the first photo, the building behind the camera prop, as well as the table in front, are not in focus. As you progress to f/3.5, more of the building and table come into focus, but the image gets darker, since less light is entering the lens.
The shutter speed also affects how much light is let into the camera, so let’s now look at shutter speed. Then, we will look at how shutter speed and aperture work together.

2. Shutter Speed

Shutter speed is exactly what it sounds like – how quickly the shutter moves, and it is measured in fractions of a second. The slower the shutter speed, the more light that will enter your lens, while a fast shutter will let in less light. In most cases, especially if you are shooting a moving subject, or you do not have a tripod, you will want to keep your shutter above 1/60, which is 1/60th of a second.
In this example, I set my aperture as small as I could, at f/22. As you can see, more of the buildings in the background are in focus than they were in the previous example, seeing as how more of the background will be in focus at f/22 than it will at an aperture like f/2.8.
Now, look at the exposure time for each of the images. At 1/20, the photo is extremely overexposed, because the shutter was very slow, and a lot of light entered the camera. As I progressed all the way to 1/200, the exposure got darker. For this scenario, somewhere around f/22 and 1/80 is close to the correct exposure.
If you have a slow shutter speed, be sure to watch out for motion blur. If you want to create sharp focus on something that is moving, you will need a fast shutter of, at the very least, somewhere in the neighborhood of 1/200. If motion is not an issue, then you will be able to use a slower shutter, below 1/60.

3. Your Assignment:

Choose an object, person, or point of focus that allows for distance.  Make the composition important.  Shoot, first, at the lowest aperture (f-stop) your camera is capable of, then at the highest f-stop.  My camera goes from f/2 up to f/22.  Bracket 5 images without moving the camera, just changing the aperture.  Now select ONE aperture you like in the first set of images and change only the shutter speed. Bracket 5 images, again, without altering the location or subject.  

In Photoshop, create a final piece sized to fit all 10 of your images.  Please leave at least 1/4 inch of white space between each image.  Label every image with the correct f/stop and shutter speed.

Due date:  January 20th at the end of class.

Monday, January 5, 2015

Hello and Welcome to Photography B!


Assignment 1: Why are you here?

This semester is going to be a great one.  With the new Photography Studio, the guest instructors, and all of you, I can't wait to see what you produce.  To get started, I want to get to know you better through the work you have already created.  You will be creating a NEW blog (due not later than January 12) and posting the following:

1. 5 of your BEST/FAVORITE images. These don't have to be assignments, just work you love and you are really proud of.
2. A short introduction of who you are.
3. An explanation of where are you heading, or where you see yourself in five years.
4. A skill or skills you want to learn or improve this semester.
5. What you want/expect from class this semester and how you want help to grow as an artist. 

Please put thought into these questions.  I'll be checking in on your blogs regularly.

Wednesday, November 5, 2014

The masks we wear.

We all have them.  A set of masks we take out and put on when we simply can't deal with our life for the moment.  We use them to hide our true feelings, to cover our wounds, to escape the pain of something happening to us or around us.  The last time you tried to hide how you felt in front of someone - embarrassment, anger, shame - what did your mask look like?  Did wearing the mask work for the moment?

Your assignment:  Post a description or list of at least five "masks" you have worn in your life.  What were they worn for, what purpose did and do they serve?  Describe how you will capture at least three of them in a final photographic TRIPTYCH.  I will be looking at composition, creativity, understanding of the concept of personal masks, and technical ability with the final images.

Due date:  Posting list of 5 masks worn - Wednesday, November 5, 2014
                 Completed Triptych - Tuesday, November 18, 2014

Monday, October 6, 2014

You're more than just a Selfie...

Another Selfie...courtesy of Kasara Schmidt

How many Selfies does it take to show the world who you are?  Seriously?  Now it's time to show the world who you really are inside.  Here's your challenge:
1.  Find images online that represent at least seven things about yourself.  Save them to a folder on the desktop.
2.  In PhotoShop, make a new document, 8 x 10 in size with a resolution of 250.
3.  Create a collage using the images you have selected by moving and placing the images onto the document.  You will be using PhotoShop tools to refine our selections.  For softer edges, use Select>modify>feather.  Remember your rules of composition assignment.  Remember you can size the images using Command T + shift to fit in the document. 

4.  Add your name with the Text Tool using a thick, black font.  Now find one of the images you collected that you think wold look good inside the word.  Copy and paste it into the document.  Put that image layer on top of the word layer.  Press Command + Option + G to put the image inside the word.  Merge the image and the text layer, but not the background layer (use the eye icon to hide the background), and move the word on top of the collage you have created.
5.  Think about moving the layers above and below.  To blend layers for a unique effect, use the Move Tool and use Shift+ to scroll through the blend modes.
6.  Save your work as both a psd (in case you want to continue working on it) and as a jpeg when you are finished to post to your blog.
7.  What is your piece about?  What did you discover about yourself.  What will the viewer discover?  Write a critiques, at least two paragraphs, on your blog under your final image.

Due Date:  October 14th, 2014


Sunday, September 28, 2014

Help! I have so many images I want to resize and it's taking me FOREVER!


  1. Once you have Photoshop opened, click on File > Scripts >Image Processor.
  2. In the Image Processor window, select the folder your images are in by clicking Select Folder.
  3. You can save in the current folder, or choose a different folder. If you save in the current folder, it will create a new folder inside it called JPEG and put the processed images there. It will not overwrite your original images.
  4. File Type – Save as a JPEG with a quality of 10. Your photos will be reduced in file size noticeably and will remain good quality.
  5. If you want to resize your images select Resize to Fit and enter the dimensions you want. Note: you need to keep the aspect ratio of your images. Make sure your original images are the same dimensions (they should be if they’re from the same camera) and divide the height and width separately by the same number to keep the ratio. For example, photos that are originally 2592 x 1944 will be resized to 1296 x 972, half of the original size, keeping the aspect ratio.
  6. Click Run and Photoshop will start processing your images. Wait for it to finish, then you can close it.
Now you can resize thousands of images with a few clicks.  WHEW!  That was so easy!

Look!  All my images resized at one time!